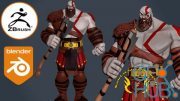
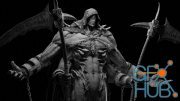
Stylized Character Sculpting in ZBrush – Majora & Skull Kid
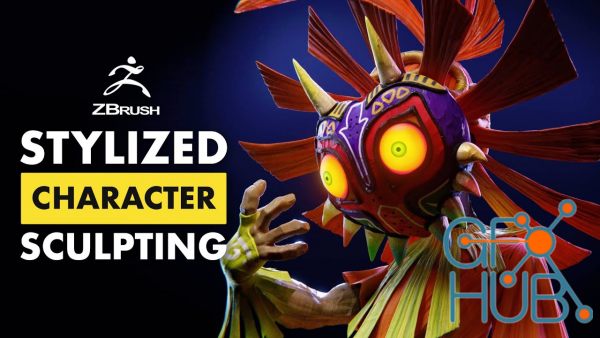
FlippedNormals – Stylized Character Sculpting in ZBrush – Majora & Skull Kid.
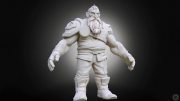
In this 10 hour course, we will go through, step by step, how to create Skull Kid with Majora’s Mask from the franchise The Legend of Zelda. You will be able to follow along with every step as nothing is skipped or time-lapsed. There’s full commentary for every chapter, giving you insight into how a professional ZBrush character artist works.
FROM A 2D CONCEPT TO A 3D CHARACTER
Most character work starts with a sketch, a piece of concept art, or a reference of the character you want to create. You’ll learn all the necessary techniques to translate a 2D concept into 3D. This concept, in particular, is challenging and iconic which presents itself with a lot of problems to solve in order to get it to look just right in 3D space.
TOOLS USED
ZBrush 2021
Other Sculpting Tools You Can Use:
Blender
3D-Coat
Mudbox
TAUGHT BY VETERAN CHARACTER ARTIST
Your instructor, Morten Jaeger – Co-Founder of FlippedNormals, has been sculpting and working with 3D for over 15 years. During his career in VFX he’s done a variety of character work on Hollywood blockbusters such as Pacific Rim: Uprising, Avengers: Infinity War & Guardians of the Galaxy: Vol. 2, just to name a few.
SKILL LEVEL
Stylized Character Sculpting in ZBrush – Majora & Skull Kid focuses on creating 3D version of a 2D character from start to finish. We’ll analyze the original designs and figure out how to translate them into a working 3D character. You should be comfortable with ZBrush before attempting to follow along as this course is aimed towards intermediate artists. That being said, no steps are skipped, so even if you’re not that advanced yet, you will still be able to follow along and learn something new.
REQUIREMENTS
Know how to use a 3D sculpting software
Have explored character art before
CONTAINS
19 HD Videos
Custom ZBrush UI & Hotkey
Chapter list
00 UI & Hotkeys
01 Basic Shapes
02 Refine Blockout
03 Majoras Mask
04 Majora Continued
05 Hat Refining
06 Gloves
07 Shape Stylization
08 Hat Feathers
09 Belt
10 Initial Posing
11 Bip
12 Pants
13 Shoes & Leg Pose
14 Finalizing Hands
15 Wrapping Up
Bonus 01 ZBrush Export
Bonus 02 Lighting in Blender
Bonus 03 Lighting Tips
NB, We’ve included three bonus chapters that focus on lighting your final sculpt in Blender. While not the focus of the tutorial, it will give you the necessary tools to create a final render like the ones we’re presenting
Download links:
Stylized Character Sculpting in ZBrush.part1.rar
Stylized Character Sculpting in ZBrush.part2.rar
Stylized Character Sculpting in ZBrush.part3.rar
Stylized Character Sculpting in ZBrush.part4.rar
Stylized Character Sculpting in ZBrush.part2.rar
Stylized Character Sculpting in ZBrush.part3.rar
Stylized Character Sculpting in ZBrush.part4.rar
Stylized_Character_Sculpting_in_ZBrush.part1.rar - 999.0 MB
Stylized_Character_Sculpting_in_ZBrush.part2.rar - 999.0 MB
Stylized_Character_Sculpting_in_ZBrush.part3.rar - 999.0 MB
Stylized_Character_Sculpting_in_ZBrush.part4.rar - 625.3 MB
Stylized_Character_Sculpting_in_ZBrush.part2.rar - 999.0 MB
Stylized_Character_Sculpting_in_ZBrush.part3.rar - 999.0 MB
Stylized_Character_Sculpting_in_ZBrush.part4.rar - 625.3 MB
Comments
Add comment
Tags
Archive
| « February 2026 » | ||||||
|---|---|---|---|---|---|---|
| Mon | Tue | Wed | Thu | Fri | Sat | Sun |
| 1 | ||||||
| 2 | 3 | 4 | 5 | 6 | 7 | 8 |
| 9 | 10 | 11 | 12 | 13 | 14 | 15 |
| 16 | 17 | 18 | 19 | 20 | 21 | 22 |
| 23 | 24 | 25 | 26 | 27 | 28 | |
Vote
New Daz3D, Poser stuff
New Books, Magazines
 2022-04-8

 2 626
2 626
 0
0


