Model a Soda Can in Cinema 4D
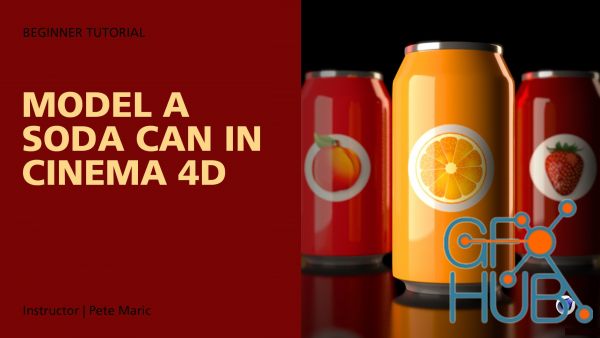
Skillshare - Model a Soda Can in Cinema 4D.
Welcome to this course on Modeling a Soda Can in Cinema 4D.
In this series of lessons we will cover a lot of topics to give you a solid understanding of the entire product visualization workflow including:
01. Reference and Inspiration
Gathering reference and inspiration images and viewing various label designs.
02. Modeling with Parametric Primitives, Points and Subdivision Surface.
Creating a project folder to save all your files.
Configuring a viewport, importing a reference image and scaling to real-world size
use a parametric primitive cylinder as the basis of modeling, add height and rotation segments.
the use of the make editable function to gain access to points, lines and polygons.
Using the point mode for shaping the soda can and loop/path cut tool to add segments as necessary
Use of the scale tool to resize sections of the model uniformly to match the reference image
Use of the polygon mode with the inset and extrude functions to model the top and bottom of the can.
Use the subdivision surface object to smooth the edges of the can.
03. Modeling the Pop Top
Connecting splines
Use of splines, extrusion and sweep NURBS to to model details.
Store selections function
04. Label Design
Reference gathered inspiration images to create a unique design.
Use of Adobe Illustrator and Photoshop to custom-craft a label with illustrations, text, nutritional information and bar code.
05. Texturing
Create a label and chrome material.
Use stored selections to apply different materials to various parts of the soda can model.
06. Environment and Lighting
Create a seamless background using a plane, background object and Cinema 4D compositing tag.
Create a 3-point light setup with a main light and 2 fill lights.
Vary the light color properties for added visual interest.
07. Cameras and Composition
Overview of composition and strategies
Use the the cloner to duplicate soda cans
Enable camera ‘grid’ to reference the rule of thirds.
Enable Depth of Field in rendering settings for added visual impact.
08. Rendering
Use of Cinema 4D’s Physical Render engine in conjunction with multi-pass layers and object buffers
Set up final output render settings.
09. Post-Production
Adjustments in Adobe Photoshop to enhance the image.
Blurs, sharpening, vignettes, adjustment layers, hue/saturation, curves.
10. Bonus Lessons
Learn additional composition, modeling and post-production techniques
MoGraph cloner with random effector
Radial and motion blurs and focusing the viewers attention on a specific area of an image
Use the MoGraph cloner in object mode to create water droplets on the soda can
Download links:
Comments
Add comment
Tags
Archive
| « February 2026 » | ||||||
|---|---|---|---|---|---|---|
| Mon | Tue | Wed | Thu | Fri | Sat | Sun |
| 1 | ||||||
| 2 | 3 | 4 | 5 | 6 | 7 | 8 |
| 9 | 10 | 11 | 12 | 13 | 14 | 15 |
| 16 | 17 | 18 | 19 | 20 | 21 | 22 |
| 23 | 24 | 25 | 26 | 27 | 28 | |
Vote
New Daz3D, Poser stuff
New Books, Magazines
 2022-02-17

 1 576
1 576
 0
0


