Sculpting realistic 3d shoes in ZBrush
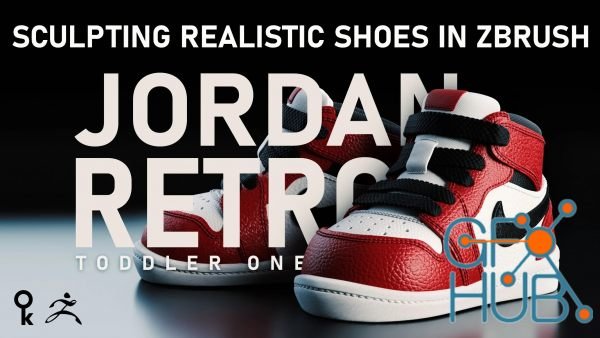
Download new video course by Skillshare – Sculpting realistic 3d shoes in ZBrush.
In this course, I will be teaching you how to create a realistic 3d sneaker using ZBrush. We will start by creating the base model of the shoe, also known as the wooden mould in the industry, this part is very important because all of the leather panels that will be making the final shoe will be extracted from this mould.
You will learn how to extract each leather layer of the shoe using the ZBrush masking pen and lasso and the inflate deformation tool. You will learn how to create thickness to the extracted panels using ZBrush panel loops.
Over two hours of in-depth sneaker sculpting using ZBrush
This course covers every aspect of the shoe sculpting process, from reference using the ZBrush see-through feature, to learning how to use ZBrush masking using the pen and lasso brush tools, to learn how to use Zmodeler and panel loops to add details like stitching and laces using curve brushes and finally exporting the model into Sketchfab so we can present the 3d model as a proper 3d sculpt and not just a 2d still render.
Here are the topics of the course:
- Extracting and creating all the shoe sections using extract plus
- Learning how to add thickness using panel loops
- Using polish by feature to clean our extracted meshes
- Learning how to use live boolean
- Using curve brushes to add details like stitching and laces
- Learning how to use Zmodeler
All the 3d files of the shoe are also included in the following formats
Zbrush
Maya
OBJ
FBX
I have also included my ZBrush custom UI
I will be sharing with you some of my favourite plugins and brush curves that I use almost on every project that I work on.
We will be extracting the panels of the 3d shoe using a plugin called Extract + which you can find and download here
https://www.artstation.com/a/10407473
While you can create these panels without the plugin, I have recorded a short video so you can see the difference between the workflows, you will find the video titled 11-Extract_plus_why.mp4 in your lessons folder.
Once we have all the panels created we can start adding details like stitching while there are many ways to create stitching in Zbrush, I will be using these beautiful curve brushes created by Mohamed Alsadany
https://www.artstation.com/a/6395032
And to make those shoes even more awesome I will be using a set of beautifully made curve brushes created by Alex Vasin that you can download here
https://artstn.co/m/dRqr
Download links:
Sculpting-realistic-3d-shoes-in-ZBrush.part1.rar
Sculpting-realistic-3d-shoes-in-ZBrush.part2.rar
Sculpting-realistic-3d-shoes-in-ZBrush.part3.rar
Sculpting-realistic-3d-shoes-in-ZBrush.part4.rar
Sculpting-realistic-3d-shoes-in-ZBrush.part2.rar
Sculpting-realistic-3d-shoes-in-ZBrush.part3.rar
Sculpting-realistic-3d-shoes-in-ZBrush.part4.rar
Sculpting-realistic-3d-shoes-in-ZBrush.part1.rar - 400.0 MB
Sculpting-realistic-3d-shoes-in-ZBrush.part2.rar - 400.0 MB
Sculpting-realistic-3d-shoes-in-ZBrush.part3.rar - 400.0 MB
Sculpting-realistic-3d-shoes-in-ZBrush.part4.rar - 171.9 MB
Sculpting-realistic-3d-shoes-in-ZBrush.part2.rar - 400.0 MB
Sculpting-realistic-3d-shoes-in-ZBrush.part3.rar - 400.0 MB
Sculpting-realistic-3d-shoes-in-ZBrush.part4.rar - 171.9 MB
Comments
Add comment
Tags
Archive
| « February 2026 » | ||||||
|---|---|---|---|---|---|---|
| Mon | Tue | Wed | Thu | Fri | Sat | Sun |
| 1 | ||||||
| 2 | 3 | 4 | 5 | 6 | 7 | 8 |
| 9 | 10 | 11 | 12 | 13 | 14 | 15 |
| 16 | 17 | 18 | 19 | 20 | 21 | 22 |
| 23 | 24 | 25 | 26 | 27 | 28 | |
Vote
New Daz3D, Poser stuff
New Books, Magazines
 2021-11-30

 2 787
2 787
 2
2


