Gumroad – REALISTIC Creature Texturing Painting Tutorial Using Mari
 2021-03-5

 2 496
2 496
 0
0
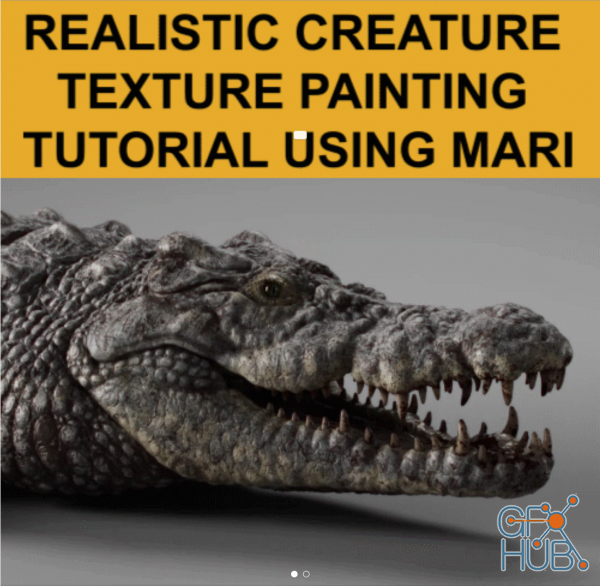
Gumroad – REALISTIC Creature Texturing Painting Tutorial Using Mari by Zak Boxall
This is a pre-recorded online texturing course, with each step recorded and structured into bite size chapters. Going from preparing a model for texturing – through to exporting final textures out of Mari.
In the VFX industry it’s almost impossible to be given an asset without photo reference to work towards, and this course will focus on creating photo-realistic textures. We won’t be creating these textures from our head, we’ll be referencing photography though the entire process to give us direction and inspiration. We’ll talk extensively on how to break down this photography and building the textures based on your own observations, to come up with a plan for how we will approach the asset.
Additionally we won’t only be trying to paint aesthetic textures, but doing so in a way where we are able to plan for any eventuality. This could be a model change, UV change or client requests. Essentially have great looking textures, whilst being flexible to changes.
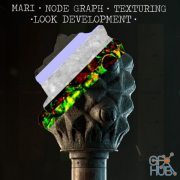
This means that we need to approach this asset with the mindset of incorporating the right balance of technical and artistic skills. We’ll work in a structured way using the incredibly powerful node graph where we will mix the efficiency of procedural methods to establish non-destructive, full coverage to ensure we can make changes on-the-fly to account for any changes, but with the ability to art direct every layer for custom paint work.
This will ensure you finish the course not only with technical skills of how to use the software, but with the confidence to take everything you’ve learnt to tackle your own creatures for that killer, industry ready showreel piece.
Contents: (Tutorial + files needed)
Part 1 – Generating cavity map
Substance designer cavity map generator will be provided, we will import our displacement map and generate a variety of masks – very useful for adding texture variation.
Part 2 – Setting up Mari, intro to Mari and blocking initial colours.
We will open up Mari for the first time and go through:
Navigation
Setting up ACES working colourspace
The interface,
Paint buffer terminology, resolution and bit depth
Introduction to the node graph
Importing utility maps using geo channels
Blocking initial colours
Part 3 – Adding overlays and painting large scale variation
We will import my surface imperfections (Maps used will be provided) and tileables to subtly, natural variation.
We will hand paint variation to ensure we have large scale variety.
Part 4 – Painting mouth/yellow skin textures
We will create a pleasing mouth texture, we will introduce our cavity masks for subtle variation. And will paint additional colour variation to match our photo reference.
We will concentrate on creating an interesting looking mask which will be used to reveal the yellow skin layer. We will mix the cavity map and grunge textures from my surface imperfections pack to add natural variation that’s also sympathetic to the model.
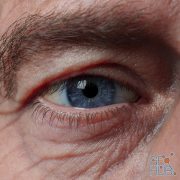
Part 5 – Painting eye textures
We will bring reference from the internet into Photoshop and prepare to project onto the model.
We will then adjust the colours to match the look we want + paint further to fit the look of the character.
Part 6 – Painting teeth textures
We will project photography onto the teeth and paint further masks to add visual interest + extra layers such as dried blood, rotten teeth roots and subtle variation.
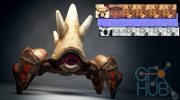
Part 7 – Painting calcium buildup
We will layer up different frequencies of calcium deposits to add the classic crocodile ‘dot’s around the face + lots of crusted buildup across the body to give a sense of history to sell the illusion this crocodile has spent a lot of time in salt water.
Part 8 – Painting dirt and dust masks
We will import custom dirt and dust presets, these are specifically created to incorporate grunge textures from my surface imperfections pack. We will balance the dirt/dust levels to a suitable level, and then we will custom paint areas to get the look we want.
Part 9 – Painting area masks
We will paint masks of areas we want to isolate for further control in look development.
Part 10 – Painting area masks – calcium buildup
We will layer up different frequencies of calcium deposits to add the classic crocodile markings.
Part 11 – Painting area masks – teeth
We will take masks we’ve painted from adding colours to the teeth, and prepare for exports for further control in look development.
Part 12 – Painting specular roughness and exporting textures
We will take our textures and balance them into a range that can be mixed in during look development.
We will export all textures using the export manager.
Download links:

REALISTIC Creature Texturing Painting Tutorial Mari Zak Boxall.part01.rar
REALISTIC Creature Texturing Painting Tutorial Mari Zak Boxall.part02.rar
REALISTIC Creature Texturing Painting Tutorial Mari Zak Boxall.part03.rar
REALISTIC Creature Texturing Painting Tutorial Mari Zak Boxall.part04.rar
REALISTIC Creature Texturing Painting Tutorial Mari Zak Boxall.part05.rar
REALISTIC Creature Texturing Painting Tutorial Mari Zak Boxall.part06.rar
REALISTIC Creature Texturing Painting Tutorial Mari Zak Boxall.part07.rar
REALISTIC Creature Texturing Painting Tutorial Mari Zak Boxall.part08.rar
REALISTIC Creature Texturing Painting Tutorial Mari Zak Boxall.part09.rar
REALISTIC Creature Texturing Painting Tutorial Mari Zak Boxall.part10.rar
REALISTIC Creature Texturing Painting Tutorial Mari Zak Boxall.part11.rar
REALISTIC Creature Texturing Painting Tutorial Mari Zak Boxall.part12.rar
REALISTIC Creature Texturing Painting Tutorial Mari Zak Boxall.part13.rar

REALISTIC_Creature_Texturing_Painting_Tutorial_Mari_Zak_Boxall.part01.rar
REALISTIC_Creature_Texturing_Painting_Tutorial_Mari_Zak_Boxall.part02.rar
REALISTIC_Creature_Texturing_Painting_Tutorial_Mari_Zak_Boxall.part03.rar
REALISTIC_Creature_Texturing_Painting_Tutorial_Mari_Zak_Boxall.part04.rar
REALISTIC_Creature_Texturing_Painting_Tutorial_Mari_Zak_Boxall.part05.rar
REALISTIC_Creature_Texturing_Painting_Tutorial_Mari_Zak_Boxall.part06.rar
REALISTIC_Creature_Texturing_Painting_Tutorial_Mari_Zak_Boxall.part07.rar
REALISTIC_Creature_Texturing_Painting_Tutorial_Mari_Zak_Boxall.part08.rar
REALISTIC_Creature_Texturing_Painting_Tutorial_Mari_Zak_Boxall.part09.rar
REALISTIC_Creature_Texturing_Painting_Tutorial_Mari_Zak_Boxall.part10.rar
REALISTIC_Creature_Texturing_Painting_Tutorial_Mari_Zak_Boxall.part11.rar

REALISTIC Creature Texturing Painting Tutorial Mari Zak Boxall.part01.rar
REALISTIC Creature Texturing Painting Tutorial Mari Zak Boxall.part02.rar
REALISTIC Creature Texturing Painting Tutorial Mari Zak Boxall.part03.rar
REALISTIC Creature Texturing Painting Tutorial Mari Zak Boxall.part04.rar
REALISTIC Creature Texturing Painting Tutorial Mari Zak Boxall.part05.rar
REALISTIC Creature Texturing Painting Tutorial Mari Zak Boxall.part06.rar
REALISTIC Creature Texturing Painting Tutorial Mari Zak Boxall.part07.rar
REALISTIC Creature Texturing Painting Tutorial Mari Zak Boxall.part08.rar
REALISTIC Creature Texturing Painting Tutorial Mari Zak Boxall.part09.rar
REALISTIC Creature Texturing Painting Tutorial Mari Zak Boxall.part10.rar
REALISTIC Creature Texturing Painting Tutorial Mari Zak Boxall.part11.rar
REALISTIC Creature Texturing Painting Tutorial Mari Zak Boxall.part12.rar
REALISTIC Creature Texturing Painting Tutorial Mari Zak Boxall.part13.rar
REALISTIC Creature Texturing Painting Tutorial Mari Zak Boxall.part02.rar
REALISTIC Creature Texturing Painting Tutorial Mari Zak Boxall.part03.rar
REALISTIC Creature Texturing Painting Tutorial Mari Zak Boxall.part04.rar
REALISTIC Creature Texturing Painting Tutorial Mari Zak Boxall.part05.rar
REALISTIC Creature Texturing Painting Tutorial Mari Zak Boxall.part06.rar
REALISTIC Creature Texturing Painting Tutorial Mari Zak Boxall.part07.rar
REALISTIC Creature Texturing Painting Tutorial Mari Zak Boxall.part08.rar
REALISTIC Creature Texturing Painting Tutorial Mari Zak Boxall.part09.rar
REALISTIC Creature Texturing Painting Tutorial Mari Zak Boxall.part10.rar
REALISTIC Creature Texturing Painting Tutorial Mari Zak Boxall.part11.rar
REALISTIC Creature Texturing Painting Tutorial Mari Zak Boxall.part12.rar
REALISTIC Creature Texturing Painting Tutorial Mari Zak Boxall.part13.rar


Video Tutorials
Comments
Add comment
Tags
Archive
| « July 2026 » | ||||||
|---|---|---|---|---|---|---|
| Mon | Tue | Wed | Thu | Fri | Sat | Sun |
| 1 | 2 | 3 | 4 | 5 | ||
| 6 | 7 | 8 | 9 | 10 | 11 | 12 |
| 13 | 14 | 15 | 16 | 17 | 18 | 19 |
| 20 | 21 | 22 | 23 | 24 | 25 | 26 |
| 27 | 28 | 29 | 30 | 31 | ||
Vote

New Daz3D, Poser stuff

New Books, Magazines