ArtStation – AAA Game Character Creation Course Part1 – High Poly
 2022-12-1

 3 911
3 911
 0
0
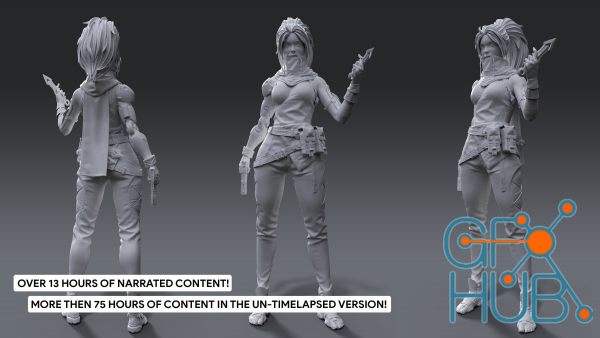
ArtStation – AAA Game Character Creation Course Part1 – High Poly (by FastTrack Tutorials)
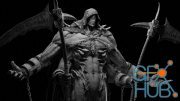
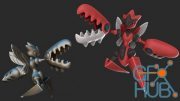
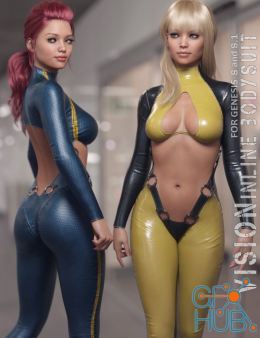
Learn how a professional character artist works when creating characters for games. You’ll learn techniques like blocking out, Cloth simulation, Skin detailing, High poly creation & detailing, hair sculpting, and much more.
ZBRUSH, MARVELOUS DESIGNER & 3DS MAX
There is a lot that will be covered in this course, but the main topics are as follows:
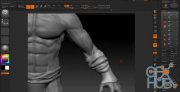
Blocking out the character in Zbrush to set the basis and proportions.
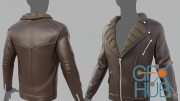
Creating realistic cloth simulations in Marvelous Designer.
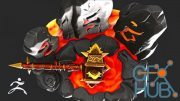
Creating the accessories and hard surface pieces in 3DS Max.
Detailing the character in Zbrush to achieve a realistic result.
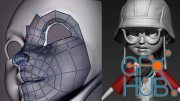
Using XYZ workflow to detail the face and skin.
Creating stylized hair in Zbrush using curve brushes.
And much more.
All the hard surface modeling will be done in 3DS Max, However, the techniques used are universal and can be replicated in any other 3d modeling package. The organic and detailing will be done using Zbrush, and the cloth simulation using Marvelous Designer.
In this course, you will learn everything you need to know to create the final results that you see in the images and trailers. Next to this, the same techniques can be applied to almost any type of character,
13 HOURS! (Options to get the Un-TimeLapsed Footage Included - Over 75+HOURS!)
This course contains over 13 hours of content just for the part 1 – You can follow along with every single step – The course does enclose some time lapses. This is just to speed up very repetitive tasks. Still, they include commentary on top for thought criteria. The rest is done in real-time. However, we have also included the time-lapsed footage in real-time as a second license option. (Please make sure to read what is included in the different licenses)
We will start by going over our reference, and then we will dive right in and create a blockout of our Character in Zbrush. Then we will first create all of our cloth simulations in Marvelous designer to, later on, bring again into Zbrush and detail them.
Once that is done, we will jump into topogun, retopologize some of the blockout pieces to, later on, use those as a base in 3d max, where we will be creating a clean high poly model of all of our character accessories and hard surface pieces.
Finally, will then jump into Zbrush one last time to create the hair, detail the face using XYZ displacement maps, and detailing the character to achieve eye-catching results.
Download links:

AAA_Game_Character_Creation_Course_Part1_-_High_Poly.part1.rar - 1.9 GB
AAA_Game_Character_Creation_Course_Part1_-_High_Poly.part2.rar - 1.9 GB
AAA_Game_Character_Creation_Course_Part1_-_High_Poly.part3.rar - 1.9 GB
AAA_Game_Character_Creation_Course_Part1_-_High_Poly.part4.rar - 1.9 GB
AAA_Game_Character_Creation_Course_Part1_-_High_Poly.part5.rar - 472.7 MB
AAA_Game_Character_Creation_Course_Part1_-_High_Poly.part2.rar - 1.9 GB
AAA_Game_Character_Creation_Course_Part1_-_High_Poly.part3.rar - 1.9 GB
AAA_Game_Character_Creation_Course_Part1_-_High_Poly.part4.rar - 1.9 GB
AAA_Game_Character_Creation_Course_Part1_-_High_Poly.part5.rar - 472.7 MB

AAA Game Character Creation Course Part1 - High Poly.part1.rar
AAA Game Character Creation Course Part1 - High Poly.part2.rar
AAA Game Character Creation Course Part1 - High Poly.part3.rar
AAA Game Character Creation Course Part1 - High Poly.part4.rar
AAA Game Character Creation Course Part1 - High Poly.part5.rar
AAA Game Character Creation Course Part1 - High Poly.part2.rar
AAA Game Character Creation Course Part1 - High Poly.part3.rar
AAA Game Character Creation Course Part1 - High Poly.part4.rar
AAA Game Character Creation Course Part1 - High Poly.part5.rar


Comments
Add comment
Tags
Archive
| « July 2026 » | ||||||
|---|---|---|---|---|---|---|
| Mon | Tue | Wed | Thu | Fri | Sat | Sun |
| 1 | 2 | 3 | 4 | 5 | ||
| 6 | 7 | 8 | 9 | 10 | 11 | 12 |
| 13 | 14 | 15 | 16 | 17 | 18 | 19 |
| 20 | 21 | 22 | 23 | 24 | 25 | 26 |
| 27 | 28 | 29 | 30 | 31 | ||
Vote

New Daz3D, Poser stuff

New Books, Magazines