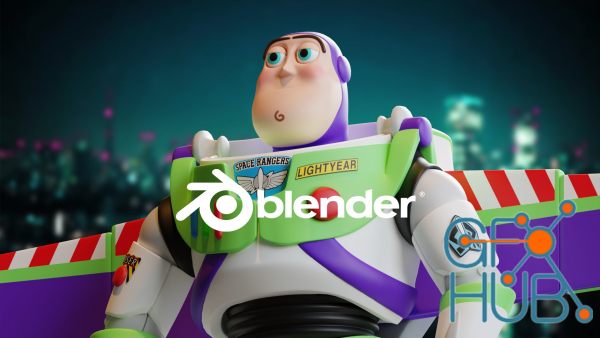
Modeling Buzz Lightyear from "Toy Story" with Blender !
 2022-04-16

 2 410
2 410
 0
0
SKillshare - Modeling Buzz Lightyear from "Toy Story" with Blender !
I recently I rewatched the Toy Story series again, and I was impressed with the movie quality that Pixar and Disney did back then. They needed a big team to create only one character; they worked for weeks, even months.
So I made the course to show you that in the next three to four hours, you will be able to achieve what they did back then, and you will do it yourself, thanks to Blender! I will help you understand and learn the concept of 3d, tools for modeling, and to model one of your favorite characters from the Toy Story.
We will create the famous Buzz Lightyear. He is one of the main characters in this film. And he is the main character in the upcoming science fiction adventure film produced by Pixar animation studios and Walt Disney Pictures called Lightyear.
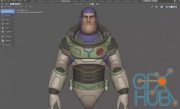
Once I insert the photos, I will be able to begin modeling. Buzz Lightyear has many details, so I will divide the modeling into several parts.
In the first part, we will model the head, and the face to better view the other pieces. Modeling will not be complicated because I will use all the basics of modeling. In addition, I will use all the basic modifiers, and I will show you how to use them properly.
When I finish modeling the head, I will start with the circle or the base for the helmet, and we will also begin modeling the upper part of the torso, which is attached to the area with the helmet.
After I finish modeling the upper part of the torso, I will focus on the lower part that binds the arms and the part attached to the pelvis.
When we finish modeling the torso, we will continue modeling the bottom part of the body, which is the pelvis, thigh, and the whole leg.
I will also make details on the legs in the form of long vertical lines on both sides of the legs and one horizontal line on the thigh.
Using the same modeling principles, I will continue modeling the arms and hands, and also, we will add the same vertical lines on the arms as we did to the legs.
When I finish modeling the arms and hands, I will model the backpack and the wings to finalize the character.
Once I finish modeling, I will add the materials; I am going to be applying all basic materials, so this part is going to be easy.
After I applied the materials, the final step was to add the stickers to the character. Once the stickers are done, I will now be focusing on the final render settings, such as adjusting the camera, adding the light or HDRI in my case, playing with the color management, and changing our render engine to cycles.
Download links:


Comments
Add comment
Tags
Archive
| « July 2026 » | ||||||
|---|---|---|---|---|---|---|
| Mon | Tue | Wed | Thu | Fri | Sat | Sun |
| 1 | 2 | 3 | 4 | 5 | ||
| 6 | 7 | 8 | 9 | 10 | 11 | 12 |
| 13 | 14 | 15 | 16 | 17 | 18 | 19 |
| 20 | 21 | 22 | 23 | 24 | 25 | 26 |
| 27 | 28 | 29 | 30 | 31 | ||
Vote

New Daz3D, Poser stuff

New Books, Magazines